To create a recurrent IQ packet for an existing case
The following steps describe how to create a recurrent IQ packet for a case that you have already created. That is, you have already created the case information, locations, and uploaded the relevant files.
You can also click here for a short video showing how to create a recurrent IQ packet.
-
For the case you want to view open the Manage case screen.
 Need help finding your case?
On the main menu click View cases. The screen that opens depends on your setting of View cases. If it is set to:
- Advanced view, then the Advanced view cases screen opens.
- If your case is listed on the Favorite & recent cases tab, click the case name to open the Manage case screen.
- If it is not listed on the Favorite & recent cases tab, then click the Cases tab. Use the search filters to help locate your case. You can also click
 to open the FILTERS group which allows you to set your own default filter defining what is displayed on this tab, for example you may wish to set it to cases that you created which are currently open.
For further information refer to Searching for a case.
- Grid view, then the View cases screen opens.
- If your case is listed under My recent cases click it to open the Manage case screen.
- If it is not listed under My recent cases then select your case from the table, using the search filters to help locate it if required. Note, by default the search is set to only display cases that you created; if you are not the original creator but an assignee then ensure you set Case filter to Assigned cases before clicking Search.
- Tree view, then the View i-cases screen opens.
- Click
 at the top-right of the screen to open either the View Cases or Advanced view cases screen and follow the above description.
- Click
- Advanced view, then the Advanced view cases screen opens.
-
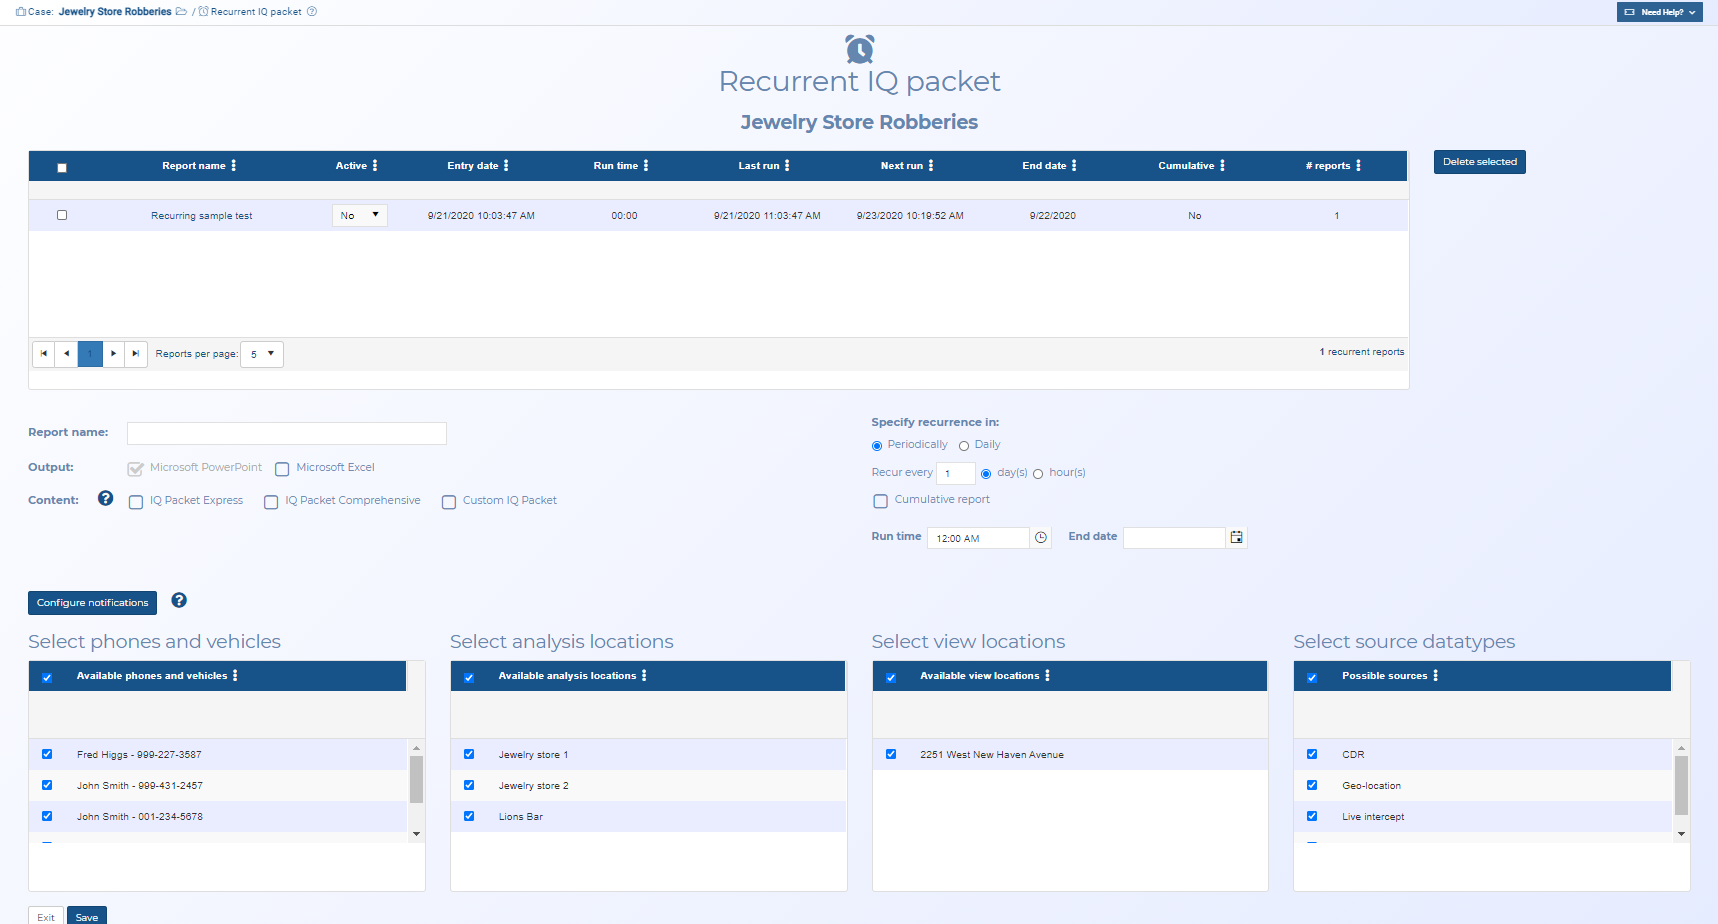
On the Manage case screen click Recurrent IQ packet.

The Recurrent IQ packet screen opens.
-
In Report name enter a name for your IQ packet.
-
In Output select the format of your IQ packet.
-
In Content select what you want included in your IQ packet. Refer to Content for further information. For example, for a Pen Register/T-III report you would select Custom IQ packet, then create a custom report that included "Live target summary".
- In Specify recurrence in select the frequency of the report generation.
- In Run time select what time you want the report to generate. This is the time based on your server location.
- In End date enter which date you want the report to stop generating. If no date is entered the report will generate until you either delete it, or you set the Active column in the table to No.
-
Select what you want included in the report using Select phones and vehicles, Select analysis locations, Select view locations and Select source datatypes.
-
By default OSS-ESPA sends email notifications to the case creator and case assignees. However, if you want other people to receive the notifications then click Configure notifications. The Report Recurrent Notifications screen opens.
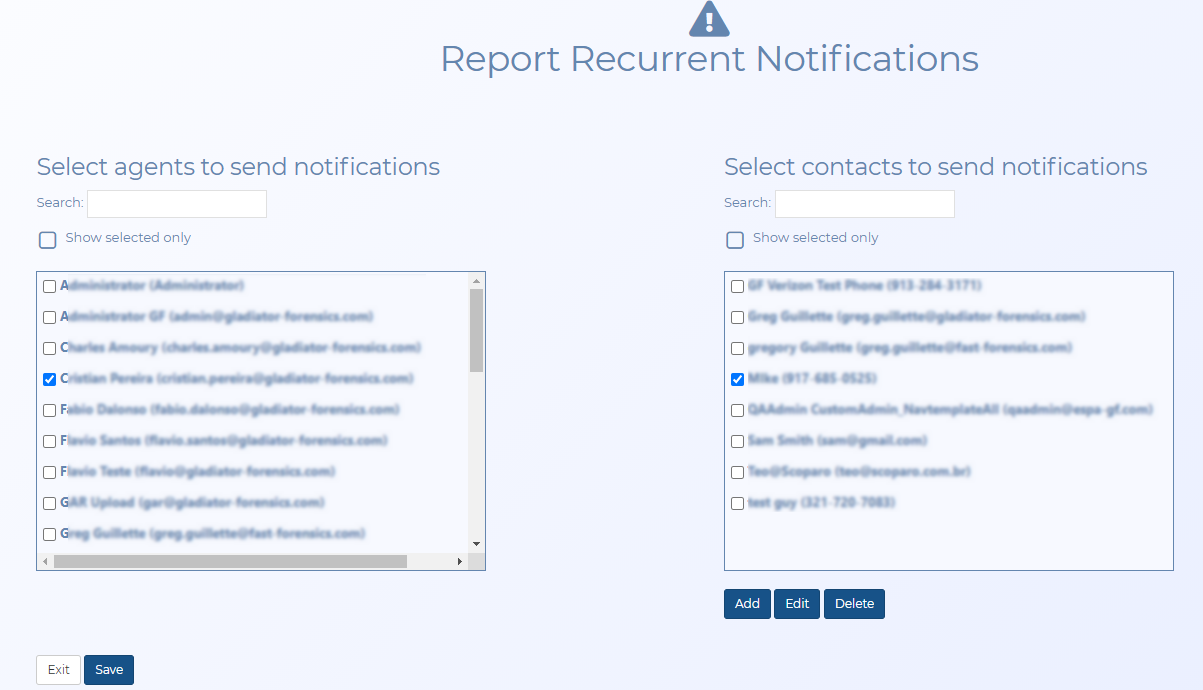
- Select the check box next to a person's name to ensure email notifications are sent to them.
- To add a new person to receive notifications who does not have an OSS-ESPA account then click Add. The Edit contact notification dialog box opens. Enter their details including selecting the notification methods then click Apply.
- Click Save.